Reading time: 7 min
Back in the Summer of 2015, I was fortunate enough to be a presenter at a workshop on Natural Movement. The workshop started with all attendees flat on their back learning about rolling. Then it moved onto various types of crawling, ways to get up, walking and finally running. I did the piece on running.
Here is a video Introduction to Natural Running that I made as part of the workshop. Those that signed in advance received the video before the day of the seminar. I wanted participants to have a feel for the content of the running section. So I used clips that a friend kindly videoed for me.
Although I demonstrate the technique while barefoot, you can easily replicate the principles while wearing shoes. I do NOT suggest you go out and start running barefoot, especially on concrete! There is a gradual process you’d need to implement to ready your body for barefoot or even minimalist shoes – but I discourage most people from actually doing it.
What most people want is improved performance with no injuries. After reading Born to Run (that you really should read), many people think that running barefoot will do both these things. But that’s not the case. You’ll likely end more messed up. But, implementing a barefoot-like running technique while wearing appropriate footwear may prove helpful though.
Onto the video!
Natural Running Technique
In the video, several slides describe the technique. Below are the slides with additional comments.
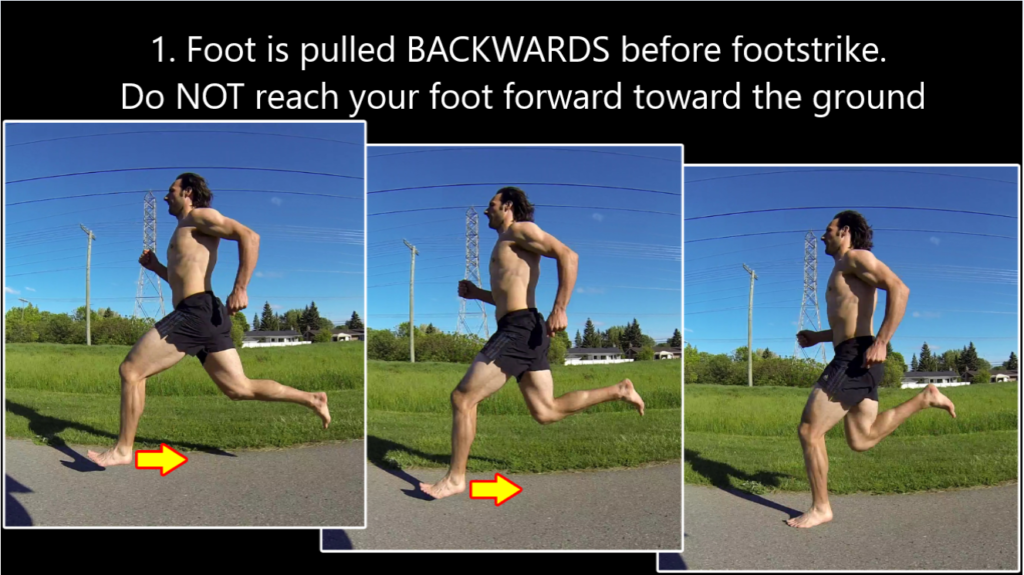
Foot Pulled Backwards Before Footstrike
Although I wrote “Foot is pulled BACKWARDS…” as the first line, the more important statement is the second one that explains what not to do. Do NOT reach your foot forward toward the ground.
Many runners reach forward. Why? Because that’s how they walk. But running and walking are distinct movements. Practice “not reaching” when you run and automatically your foot will be pulled back before footstrike.
Often when it comes to Natural Running, you are better to focus on what to “not do” to improve. You’ll see there are several “not do’s” to come.
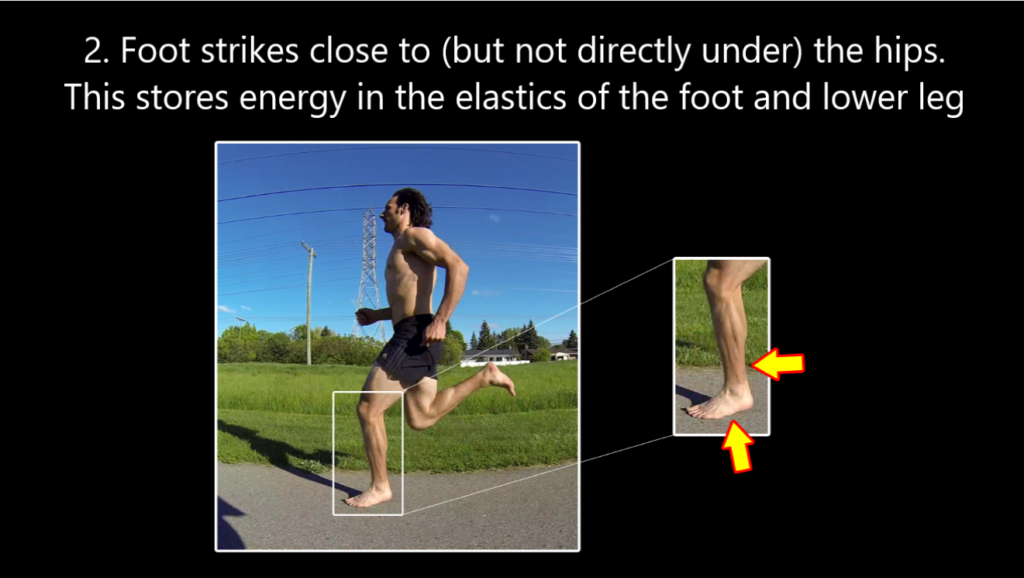
Foot Strikes Close to the Hips
Some running articles emphasize having the foot land directly under the hips. I don’t agree with this. To have the foot land directly under the hips, you have to lean so far forward that you end up wasting energy, not saving it.
Yes, you want to be leaning forward (see next slide). Yes, you want the foot to be close to the hips when it strikes (as described on the slide above). And, yes, you want the foot to be directly under the hips when your foot is supporting your full body weight.
But, the best place for the foot to strike is a little in front of the hips. It allows energy to be stored in the Achilles tendon and calve muscles that will be released as the foot comes off the ground. Plus it removes the need to lean forward excessively.
Posture in Stance
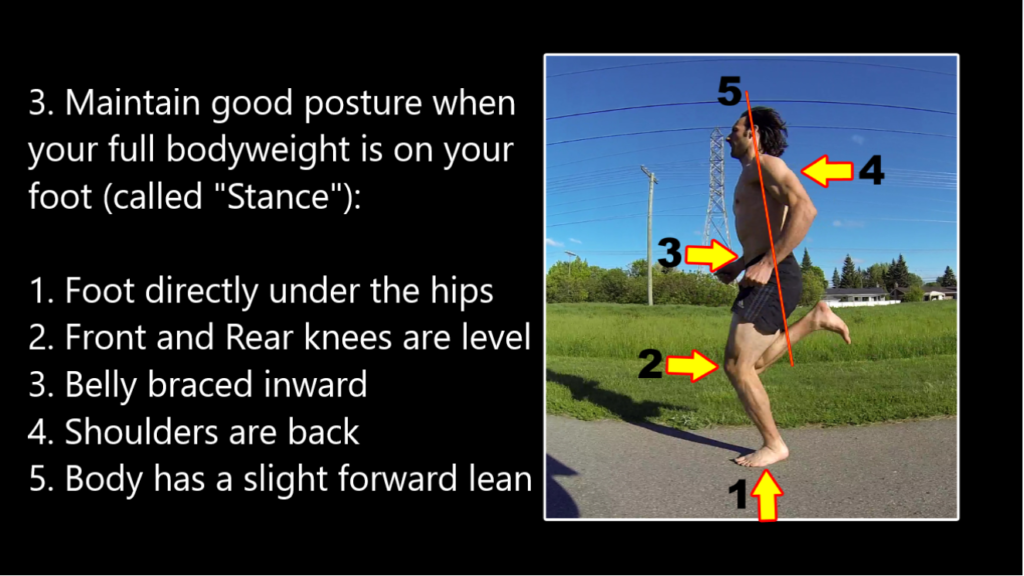
The comments above addressed Point #1.
Point #5. The Forward Lean is mentioned frequently in articles on running technique. It is important. Some of the lean will be a “whole-body lean” coming from the ankles. Some of the lean will be from your waist. You can see I have a bit of both.
The “whole body” lean shifts your center of balance to the balls of the feet rather than the heels. To understand what I mean, stand tall with the weight on your heels and look ahead. Then lean forward from the ankles just enough until you feel your weight shift from the heels to the balls of the feet and toes. This position will load the foot correctly and promote more propulsion from your hips – more to come on the next slide.
Some articles posit that any lean from the waist is poor technique, but this is incorrect. There is no doubt that many runners lean forward too much from the waist. But this does not mean that all leaning from the waist is wrong. The amount bend from the waist depends on several factors specific to the runner, including structural and muscular considerations. I wrote a full post on the topic of Forward Lean. Check out the post if you want to learn more.
Point #2. Many runners that focus on “pushing” themselves forward from the knee (quads) and ankles (calves) end up having the rear knee behind the front knee at this point is the running stride. Natural Running is less about “pushing” and more about propulsion via hip drive. See the next slide for more details. In a nutshell, if you stop pushing off from your rear leg, it won’t trail behind you.
Point #3 and Point #4. These refer to general weak points in most people’s posture. Improved posture makes Natural Running easier to learn and feel more natural. The best way to address these is through awareness and strengthening exercises that coordinate some of the key muscles in the body. Simple examples include:
- Glute bridges using the following sequence: squeeze the pelvic floor (hold in a pee and a poo), brace the abdominals, press your shoulder blades into the ground then lift the hips as high as you can without losing the tension in the pelvic floor or the abs. This sequence teaches your body to engage the glutes at the same time as keeping the belly braced and the shoulders back.
- Scap Push-Ups using the following sequence: get into a push-up position, squeeze the pelvic floor (hold in a pee and a poo), brace the abdominals, retract (bring together) the shoulder blades, protract (spread apart) the shoulder blades without losing the tension in the pelvic floor or the abs. This sequence develops an awareness of your shoulder position when the trunk is under tension. Typically most people’s shoulder blades are too protracted (spread apart) when running. The goal is not to completely retract (bring together) them. Ideally, they’ll be somewhere in the middle of protracted and retracted. This exercise helps you develop that feel.
When you go for a run after having practiced these and other similar exercises, your posture during Stance will slowly adjust itself.
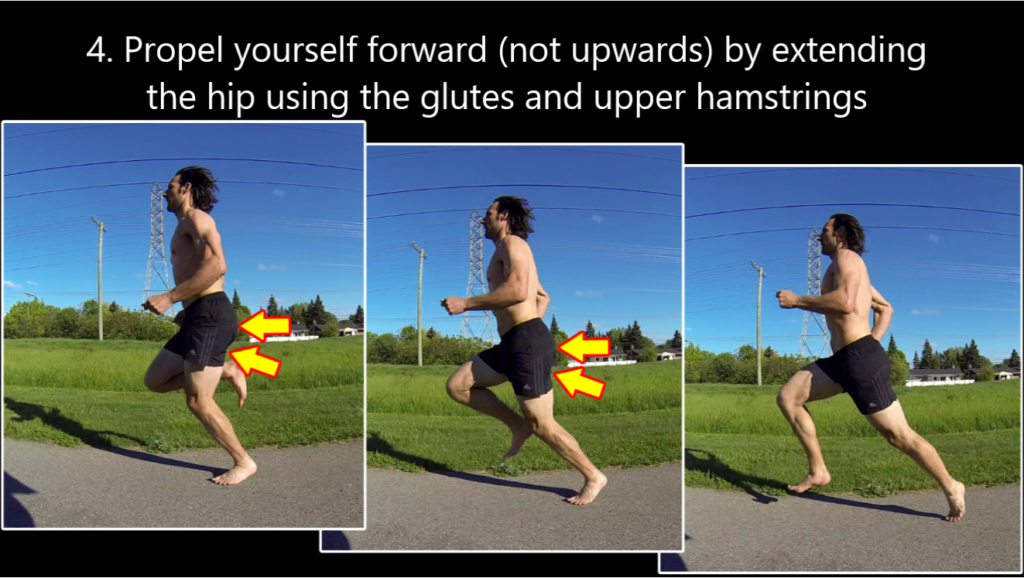
Propel Yourself Forward
Your glutes and high hamstring are hip extensors. They drive the leg behind as you can see in the images on the slide. The glute does the vast majority of the work with assistance from the high hamstring, especially during hills and accelerations. Learning how to extend from the hip as your primary propulsive force is a key to Natural Running – but it is not easy to learn.
Many runners use knee extension (quads) or ankle plantar flexion (calves) as the primary propulsive forces missing out on the hip drive. The knees and ankles direct the force more upwards than forward leading to a bouncy running style. Ideally, you want hip extension to be the first and most potent force that drives you forward. Then the knees and ankles offer assistance to the hip, which leads to just the right amount of vertical oscillation because some vertical force is necessary.
A simple way to start learning what hip extension feels like is to perform the glute bridge exercise described above. From there, you can work your way toward deadlift and hip hinge style exercises. Then you can practice dynamic hip extension by learning kettlebell (KB) swings. The hip extension movement pattern during a KB Swing is surprisingly similar to a Natural Running gait.
Learning the KB swing, in general, is a great way to get a better feel for hip extension. If this interests you, hire a KB instructor and follow a guided step-by-step process toward learning the KB swing exercise. I highly recommend finding a local Strong First certified KB instructor – called SFG to guide you. The Strong First KB program is top-notch.
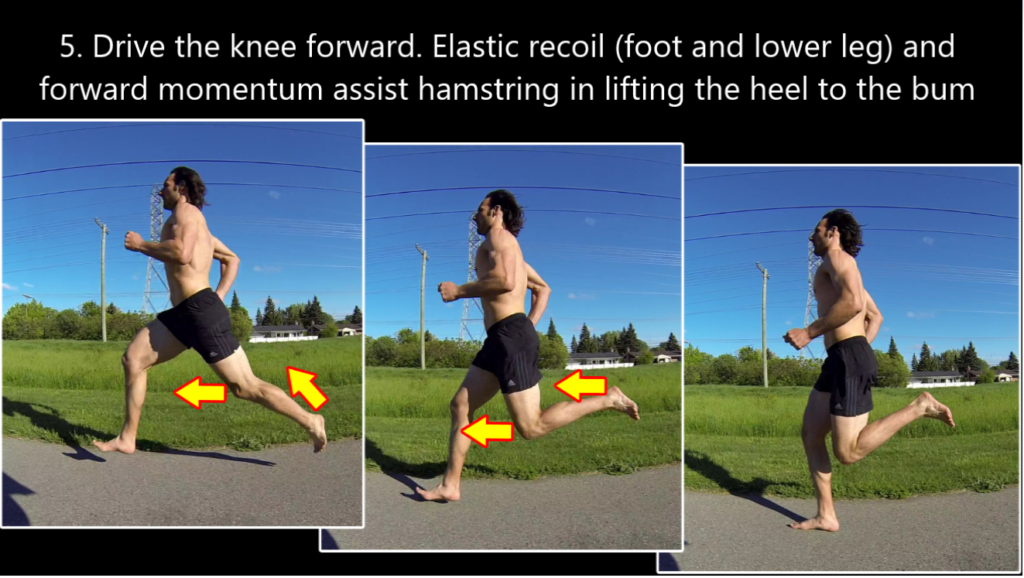
“Recovery” Phase
The “recovery” phase is a more-or-less passive phase when your leg swings from behind you to in front of you pretty much automatically. There are several “do not’s” during this phase:
- Do not lift the heel toward the bum. The elastic recoil you stored in your legs from slide 2 will do that automatically for you.
- Do not lift the knee high in front of you – we want the knees moving forward rather than upward.
- Do not give one last push into the as your toes come off the ground. Elastic recoil will decrease. And, your rear leg will trail behind you as was mentioned in slide 3 point #2
If you actively do anything at this point drive the knee forward for a split second the moment your toes come off the ground. Your leg will enter the “recovery” phase faster. Focus on raising the topmost part of the rear thigh – the part right near the hip. You’ll engage the hip flexors more than the quads.
Also, at this point, your other leg is now in the position of slide 1, so you may want to focus on that leg!
Arm Swing
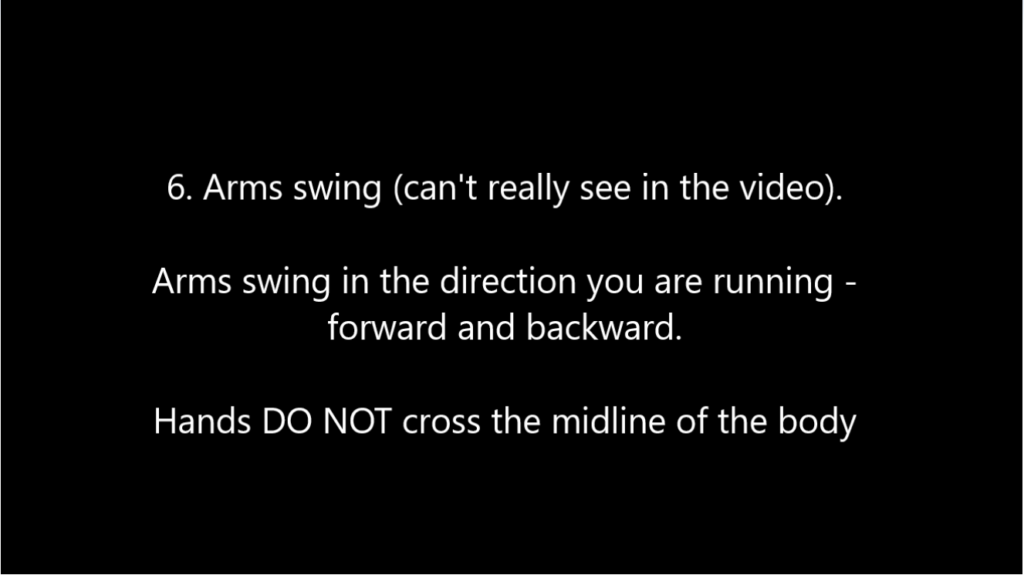
Unfortunately, I was not able to capture the arm swing in the Natural Running video. There are two key points when it comes to arm swing:
- Your arm swing acts as a way to stabilize your body when you run,
- You do not want your arm to create rotational momentum. If you’re unstable somewhere in your truck, hips or legs, your arms will swing side-to-side and build rotational momentum.
If both your arms swing side-to-side and both your elbows stick out to the side, it could be a lack of awareness. In this case, practice bringing both your elbows in closer to your rib cage. Then automatically, your arm swing will become more forward and back. But, if you feel off-balance when you do this, then your side to side arm swing was your body’s way of stabilizing itself when running. In this case, you’ll want to perform stability strengthening exercises for both legs until your elbows move in and your arms swing forward-back arm automatically.
If your arms do strange asymmetric things when you run, it is a sign that you lack stability more on one side of the body. For example, maybe your right elbow sticks out to the side, the right arm swings side-to-side, but the left elbow is in close to the rib cage, and the left arm swings forward and back. It looks like you’re playing air guitar while running. This asymmetry suggests a lack of stability somewhere in the left hip or leg – the opposite side of the unusual arm swing. In this case, do stability strengthening exercises with an emphasis on the left leg. Typically you’ll need to two to four times more reps on the unstable side to correct the imbalance. When you notice your right arm swing begins to correct itself automatically, the stability through the left leg has improved.
Note that everyone is asymmetric, so I don’t suggest you fret over small differences. But if there is a significant difference or your friend tell you that your arms look “funny” when you run, you’ll benefit substantially from stability work.
Enjoy practicing your Natural Running!
